
Saturday, May 24, 2014
New picture for the Twitter account!
Don't forget to follow the Pi Farm on twitter if you want to be spammed every hour with the latest temperature, humidity, and light level information.
First sprouts after 4 days!
After only 4 days I have my first sprouts coming up from the perlite.
Three little sprouts from one of the tomato cups and 2 from the lemongrass cup!


Three little sprouts from one of the tomato cups and 2 from the lemongrass cup!
Will post more pictures when more plants appear.
Pi farm is up and running!
Time for plants!
The water has been recirculating for severals days without incident and the Raspberry Pi has been happily tweeting every hour in its new home for a while. Time to add some plants.
I bought some smaller solo cups and cut slits in the bottom, the same way I did for the fish tank pilot study I did this winter. It allows a bit of water to seep into the cup and get soaked up my the perlite. Kind of hard to see, sorry.

I then cut the cups down to a size that would let them only peek up over the gutter. Then I filled them about half way with what I refer to as cocoa puffs. They are obviously not cocoa puffs, but larger and should provide more structure than the perlite will for the deeper roots. Basically just like perlite though, super porous material that the roots can grab onto and can soak up lots of water.

I bought some smaller solo cups and cut slits in the bottom, the same way I did for the fish tank pilot study I did this winter. It allows a bit of water to seep into the cup and get soaked up my the perlite. Kind of hard to see, sorry.
I then cut the cups down to a size that would let them only peek up over the gutter. Then I filled them about half way with what I refer to as cocoa puffs. They are obviously not cocoa puffs, but larger and should provide more structure than the perlite will for the deeper roots. Basically just like perlite though, super porous material that the roots can grab onto and can soak up lots of water.
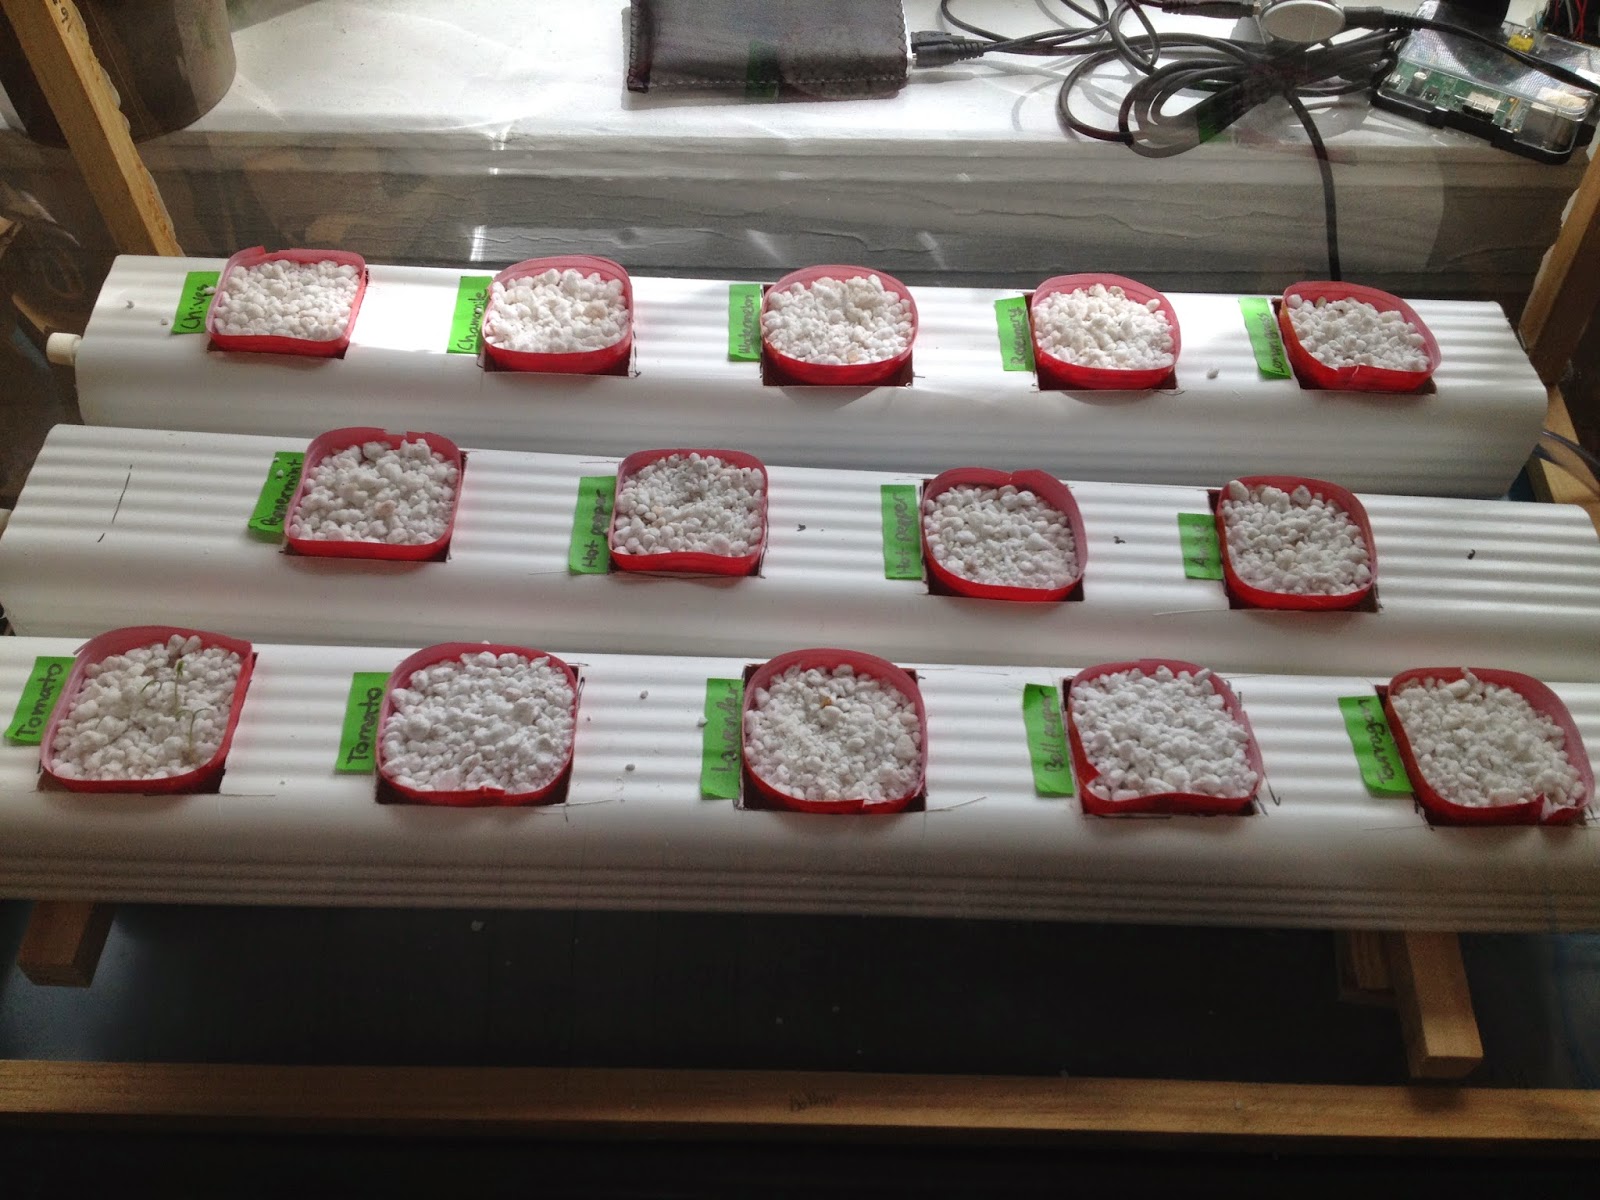
I then filled these nearly to the top with perlite, added seeds, then another 1/4 inch of perlite on top of the seeds. I used some green tape to label each gutter spot with what seeds I planted.
I planted chives, chamomile, watermelon (probably not going to work but I though it would be fun to try), rosemary, lemongrass, peppermint, two hot pepper plants, anise, two cherry tomato plants, lavender, bell peppers, and tarragon.
I can't believe I forgot mint, cilantro and basil. Oh well, I will plant these if any of my first set of sets don't take off.
Also given that my tomatoes will need support at some point, it should be fairly easy to attach some vertical supports to the wooden frame of the greenhouse.
All set and ready to grow!
New apartment new hydroponics!
Got a great new apartment with some proper south facing windows instead of the terrible-for-growth north facing windows. Finally time to start building the full-sized (full-sized for a small apartment that is) hydroponic set up and greenhouse.
Materials
Cart/Table: I bought this colorful small metal cart from Ikea
http://www.ikea.com/us/en/catalog/products/90208449/
Gave me a 26 x 18 footprint to build the greenhouse. I could have done without the wheels at first, especially since they don't lock but it has actually turned out to be nice to roll it around. The lower shelf is perfect for the reservoir and being all metal I don't have to worry too much about water damage like I would have on a wooden based table.
Greenhouse:
I bought some wood from my local hardware store, and instead of getting "nice" wood I opted for cheap wooden stakes that were ~6feet and not exactly all straight but I tried to pick the best ones I could find. I think I bought 6-8 wooden stakes for less than $20. Used a hack saw to cut them down to size and used wood screws to assemble the whole greenhouse. I am sorry I don't have progress pictures of this. For the top I made a small A-frame and added to hinges so I can gain access to the plants from the top.
I struggled with what to cover the frame with. Plexiglass would look super professional but its not the easiest to cut with the hand tools I have not to mention it is quite heavy and expensive. That brought me to flexible plastics and tarps like you get from the dry cleaners or for painting. These are cheap and light duty but I really wanted it to be crystal clear and many of these options are opaque and I didn't really want it to seem like I just glued some trash bags to the outside of a wooden frame since this is supposed to look nice in my living room. I was at the local art supply store looking for something else when I stubbled upon large sheets of clear plastic people use to make custom stencils. It was perfect, thicker than a trash bag so it wouldn't crinkle or feel cheap, crystal clear, and only $1.89 for a 28 x 40 sheet. I bought 4-5, cut them easily with scissors and hot glued them to the wooden frame. Where the water tubing come out, I just cut slits in the plastic so the tubes can exit.
Water handling:
For the troughs I bought 1, 10-foot length of white vinyl gutter (2x3 cross section) and cut it into 2 foot sections. I opted for vinyl over metal to make it easier to cut which is especially important for the holes I would need to cut into the top for the plants. I didn't want to buy a 2 or 3 inch hole boring drill bit. The vinyl allowed me to just cut holes with a box cutter. (it was hard, but possible)
So I cut 5 holes into 2 of the gutters and 4 holes into a third. This is probably too many plants in a small area however I am expecting some seeds to not do as well as others and so I can adjust later. In between each hole I glued 1 inch high baffle. The baffles are made out of the plastic rectangles I showed in my "Miniature Hydroponic Test Drive" post. The glued them in with 100% silicone sealant. Here you can see them, they should hold up the water just enough to ensure that each plant is sitting in a thin layer of water.
To connect the water to the troughs I used both 1/4 in and 1/2 inch plastic tubing. The 1/4 tubing runs from the same small 80gph aquarium pump I used in my fish tank trial and feeds into these air valves (that I am using to control water not air) I got from the pet store. I liked them because they were cheap, had a screw valve I could adjust the flow rate and were bent at a 90 degree angle. Being able to adjust the flow rate turned out to be a really nice feature as the path length and flow of the water through the tubes and Y splitters was not even, resulting in uneven water flow in each of the three tubes. Being able to adjust the flow rate allowed me to even this out.
As you can see above I used the same silicone sealant to glue my valves to the end of the gutters. I used the same baffle on the end but spread glue over all the wholes to make a cap of sorts. This allows the water to pool here to raise the high before it can go over the first baffle and provides a scaffold for the valves to attach to.
To collect the water out the back I used larger diameter 1/2inch tubing so that it was more like a drain. I glued two small pieces of gutter vinyl to channel the water into the tubing. I also cut a three way splitter into three individual nipples and glues these to the gutter. This way I could disconnect the drain tubing without having to disrupt any glue. I hope this is clear from the pictures below. The plastic nipples are glued onto the gutter and the tubing its connected on the outside of the gutter.
The drain tubing then dumps its water back into the reservoir where I currently have a couple inches of water. Maybe 2 gallons. I am keeping that level low in the beginning while all the tubing proves that it can function without leaking water and pumping it all over my floor. But so far so good. The water seems to be circulating just fine, the drain tubes are way to big for the job but thats kinda how I wanted it, since it would be a disaster if those ever back up and spill water everywhere.
The reservoir on the bottom is just a plastic tub I bought. I was hoping my fish tank would fit under but it did not, it was too tall. I will probably use the lid on the tub to keep random organisms from finding their way into my nutrient rich water but for now its open air. Also to that end I also found a germicidal UV-C light bulb for my fish tank lid that I will use to irradiate the water (maybe once a week for 30-60 minutes?) I wonder if it will do anything funky to the chemical nutrients in the water. UV light has a tendency to cross link chemical bonds in a variety of ways. (Which is what damages your DNA/ gives you cancer and why it is used to kill microorganism and sterilize lab equipment)
Sorry this is upside down...
Once the water recirculates for a couple days I will consider adding the plant cups and start growing plants!
Fish Tank hydroponic growth success!
The flow rate of the water was plenty, I needed very little water to keep the plants hydrated. The cups filled up quickly, the perlite gets damp within a few seconds of the water being on. I took a picture of the growth everyday for about 2 months with my GoPro. Here is a time lapse of the pictures I took. The lettuce and basil really exploded early with the mint coming on later. I turn the light in the fish tank on when I got up and turn it off before bed so it was on for roughly 16 hours a day. As you can see the fish tank did a great job of keeping the humidity up. The water heater kept the temperature very nice and warm and the plants still thrived in the dead of Chicago winter!
Also important to note that I did get some white fluffy fungal growth on the sides of the tank and in the water. As you can see I also had some green algae of some sort grow on the perlite itself, although this never transitioned to the water below.
Also important to note that I did get some white fluffy fungal growth on the sides of the tank and in the water. As you can see I also had some green algae of some sort grow on the perlite itself, although this never transitioned to the water below.
Subscribe to:
Comments (Atom)